BLOCKS: a two-day art project
Creating interactive visuals with JavaScript.
(40 minute read)I've been ruminating on interactive, generative (no, not that kind of generative) visual art for a while now. Having been to my fair share of concerts and exhibitions, I'm always stunned by how live-visual artists approach the task of elevating a story through conscious, deliberate design. Especially with concert visuals — being software-driven — I can't help but wonder: why shouldn't I do that too?
So here's the plan: we're going to create a small, interactive, audiovisual art piece on the front page of this site.
A short design study
Not even two weeks ago I found some letterhead for NY real estate developer PLOT Advisory on Pinterest.
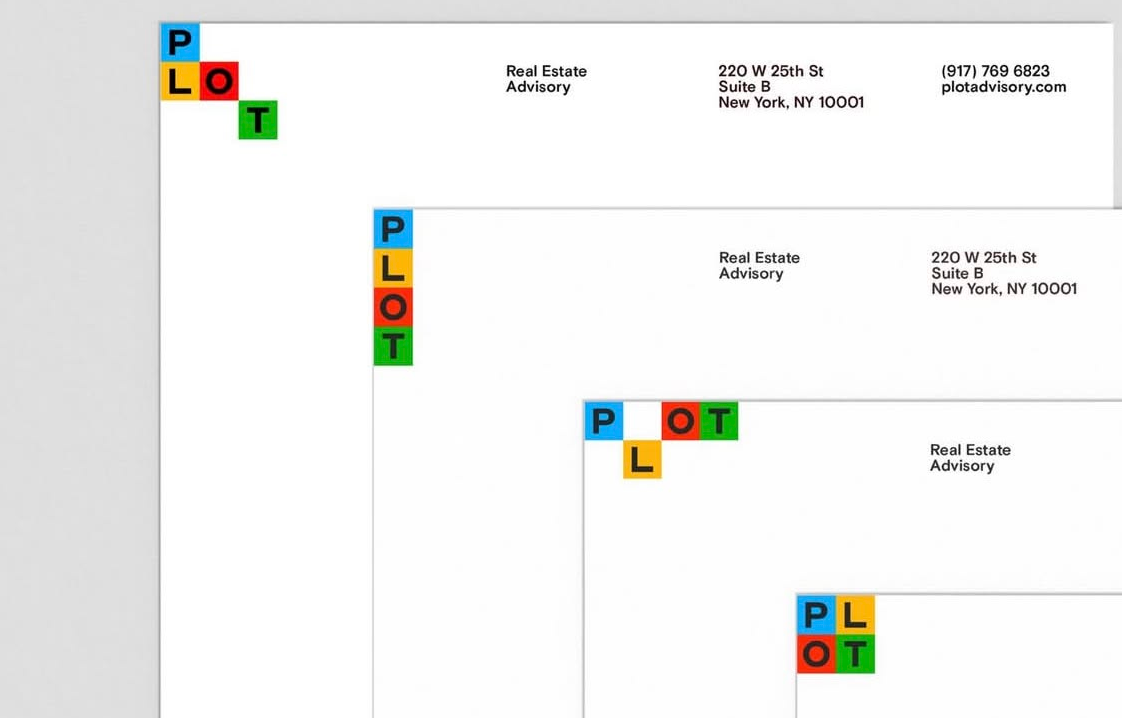
I love simple geometries and primary-secondary color palettes. I adore the way each iteration of the letterhead slightly reconfigures the position of the logo, suggesting movement from one to the other. If we're to make an interactive something with this idea, the implementation would probably function like this:
- Blocks must bind to a grid.
- Blocks can only move into adjacent, unoccupied grid positions.
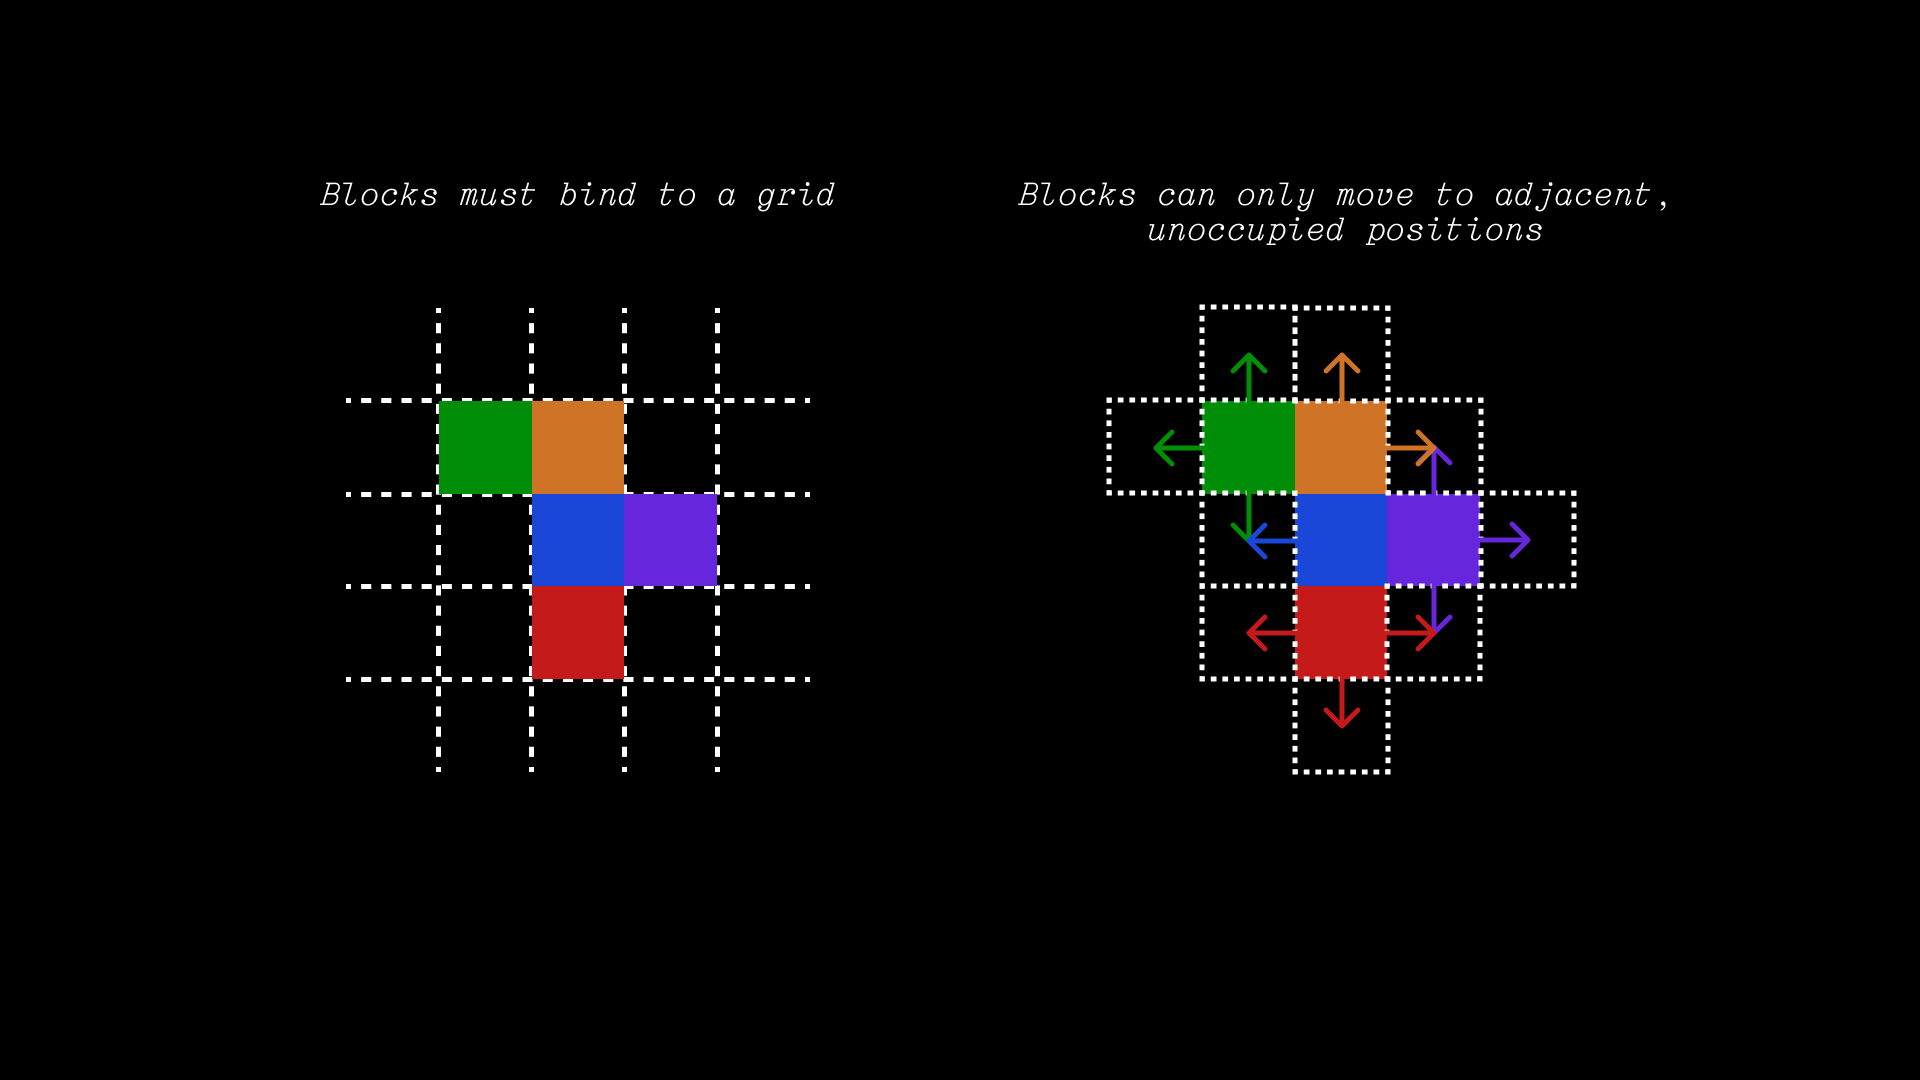
This is enough to establish the hypothetical basics of the movement and interactivity, but there is an additional layer of complexity that comes with the fact the there are letters in the blocks. Ideally, I'd like to maintain legibility, which is in itself a design and behavior conversation. Not all configurations of blocks will result in good design due to how the word might be read:
- Good configurations maintain a top-left to bottom-right eye movement.
- Bad configurations break the top-left bottom-right rule.
But then there's an issue of unusual configurations which still parse without breaking the reader's eye movement. The third example from PLOT demonstrates this by having the "L" dip low, technically introducing a bottom-left to top-right pattern but still preserving hierarchy since Latin languages enforce it by being primarily read left-to-right.
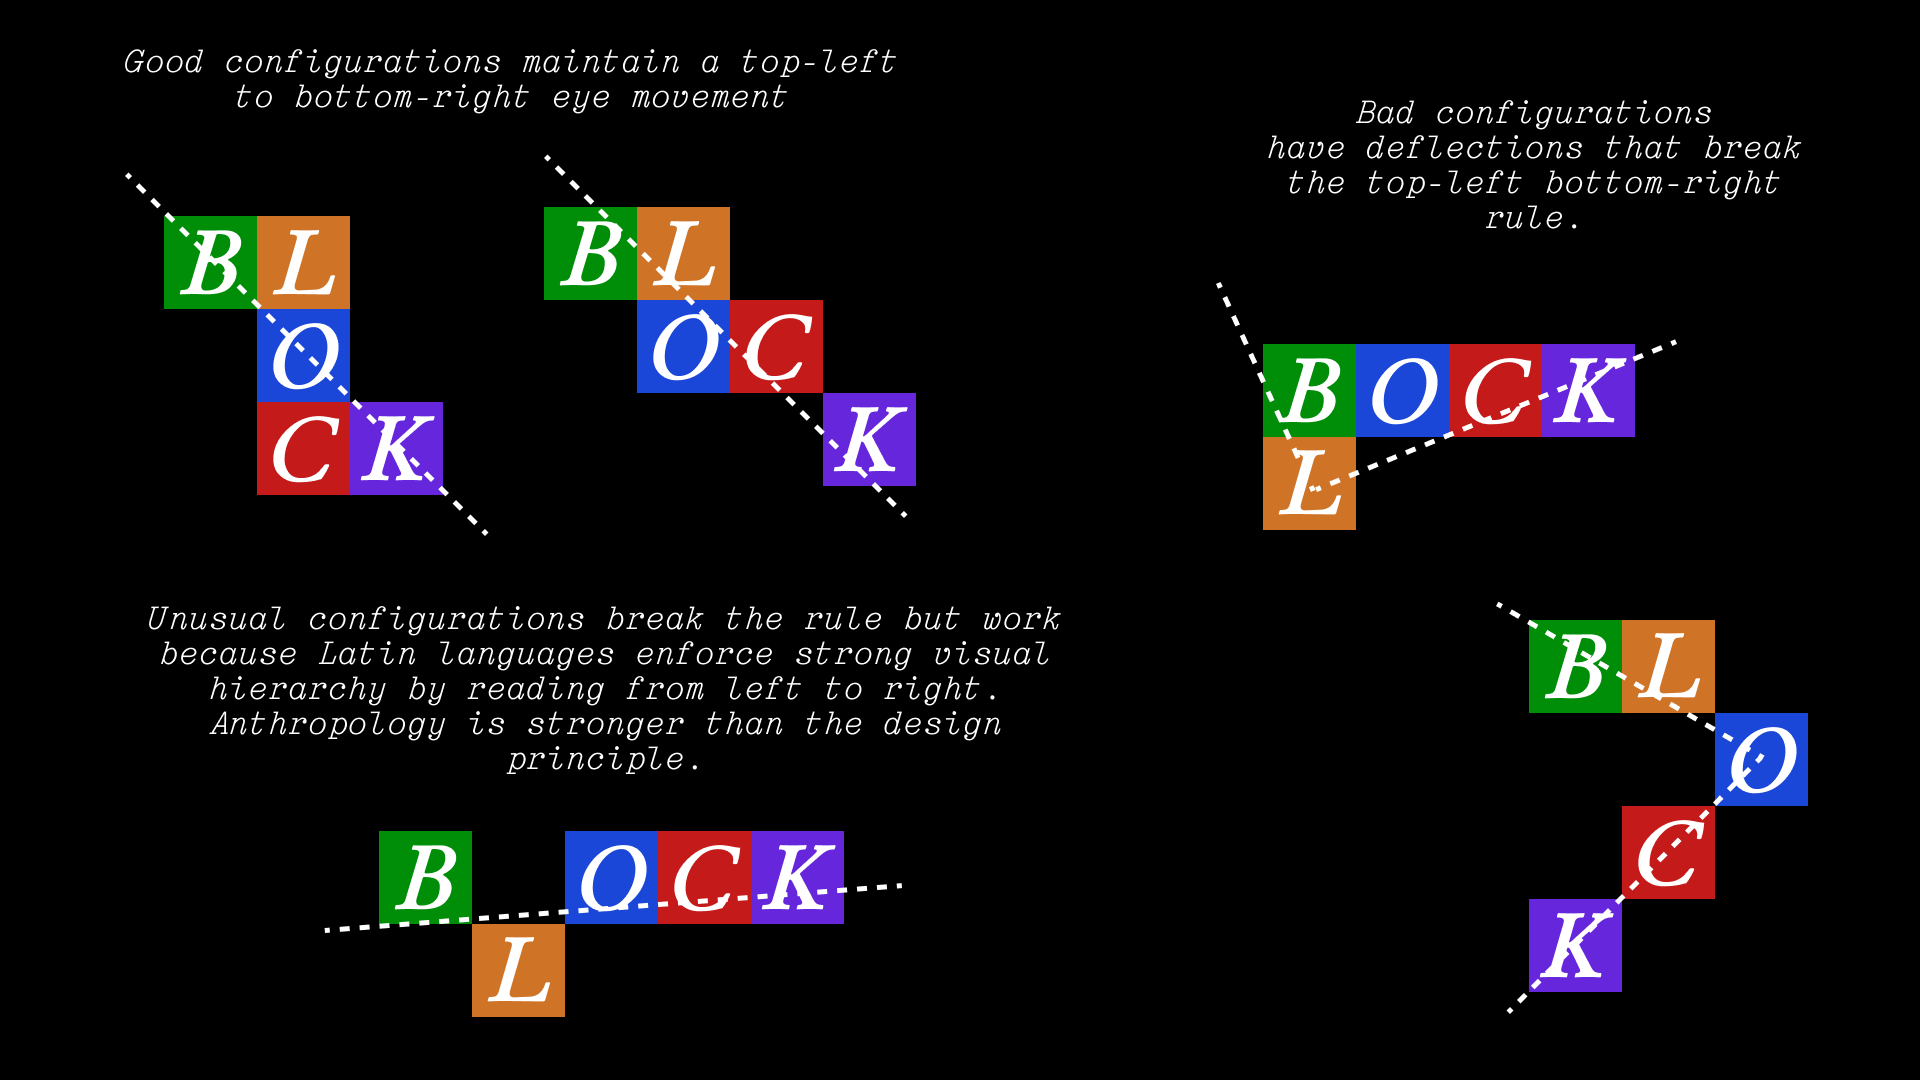
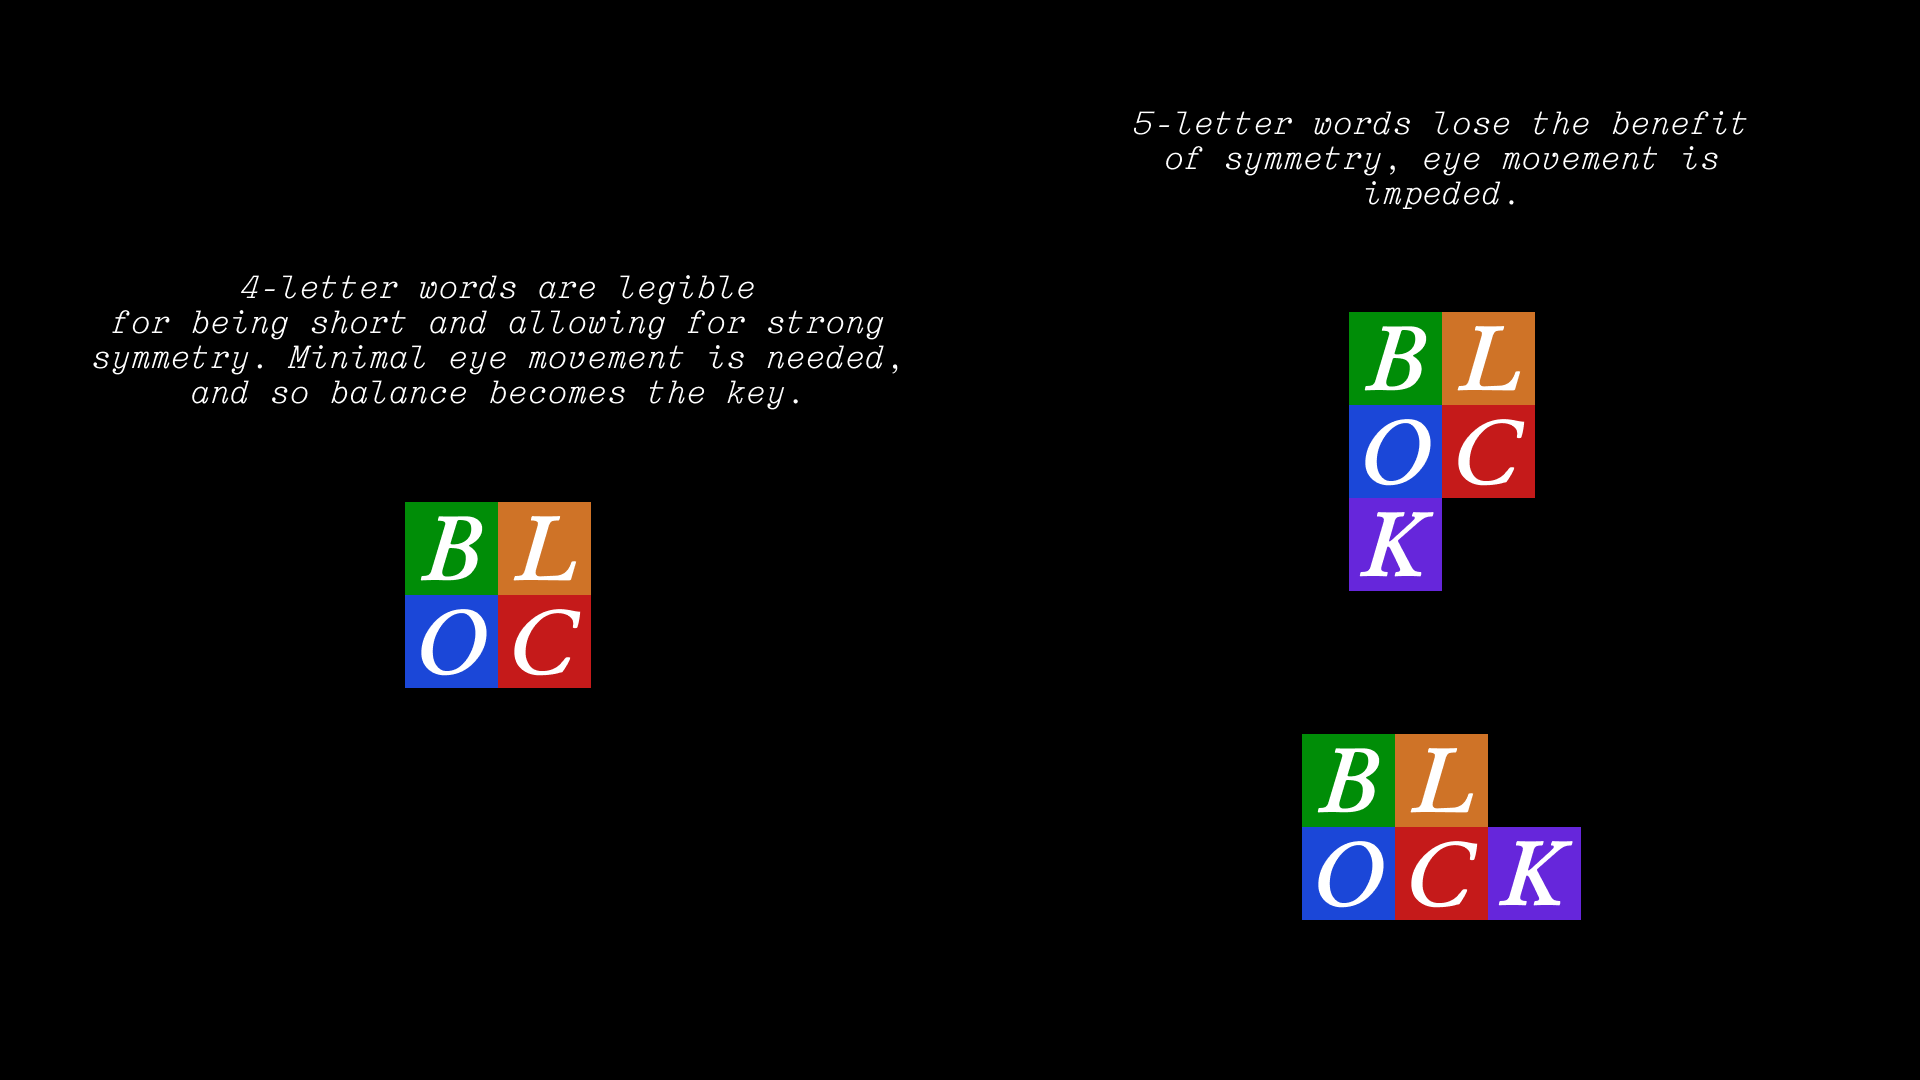
But there is another exception in symmetry. The fourth example from PLOT shows the top-left bottom-right rule being broken, though still being legible because reading one line to the next in a Z-pattern is how Latin languages work. Make no mistake, there is still friction here in terms of eye movement, but it's smoothed over by the symmetry of the configuration. Four-letter words are easy to read at a glance and humans prefer symmetrical forms.
But none of this matters if we can't force symmetry, such as in the case of a five-letter word. The configuration becomes laborious to read even though we are treading the Z-pattern. The Z-pattern introduces visual friction, even though Latin-language readers are conditioned for it.
Then we start getting into the psychology of line breaks and the rabbit hole just keeps going. The point of this exercise is to take what we can out of a source of inspiration — a real estate firm's letterhead in this case — and then weigh pros and cons, available tools, relevant skills, and make something new with it.
Implementing
It's clear we're looking to work with letters in blocks tied to a grid. We want some sort of movement with these elements. We also want to keep our scope trim and achievable; there's a lot of ground to cover with visual hierarchy and allowing block movement, and we may not be able to get to all of it.
Remember: we aren't writing enterprise software, we are merely experimenting.
Creating blocks
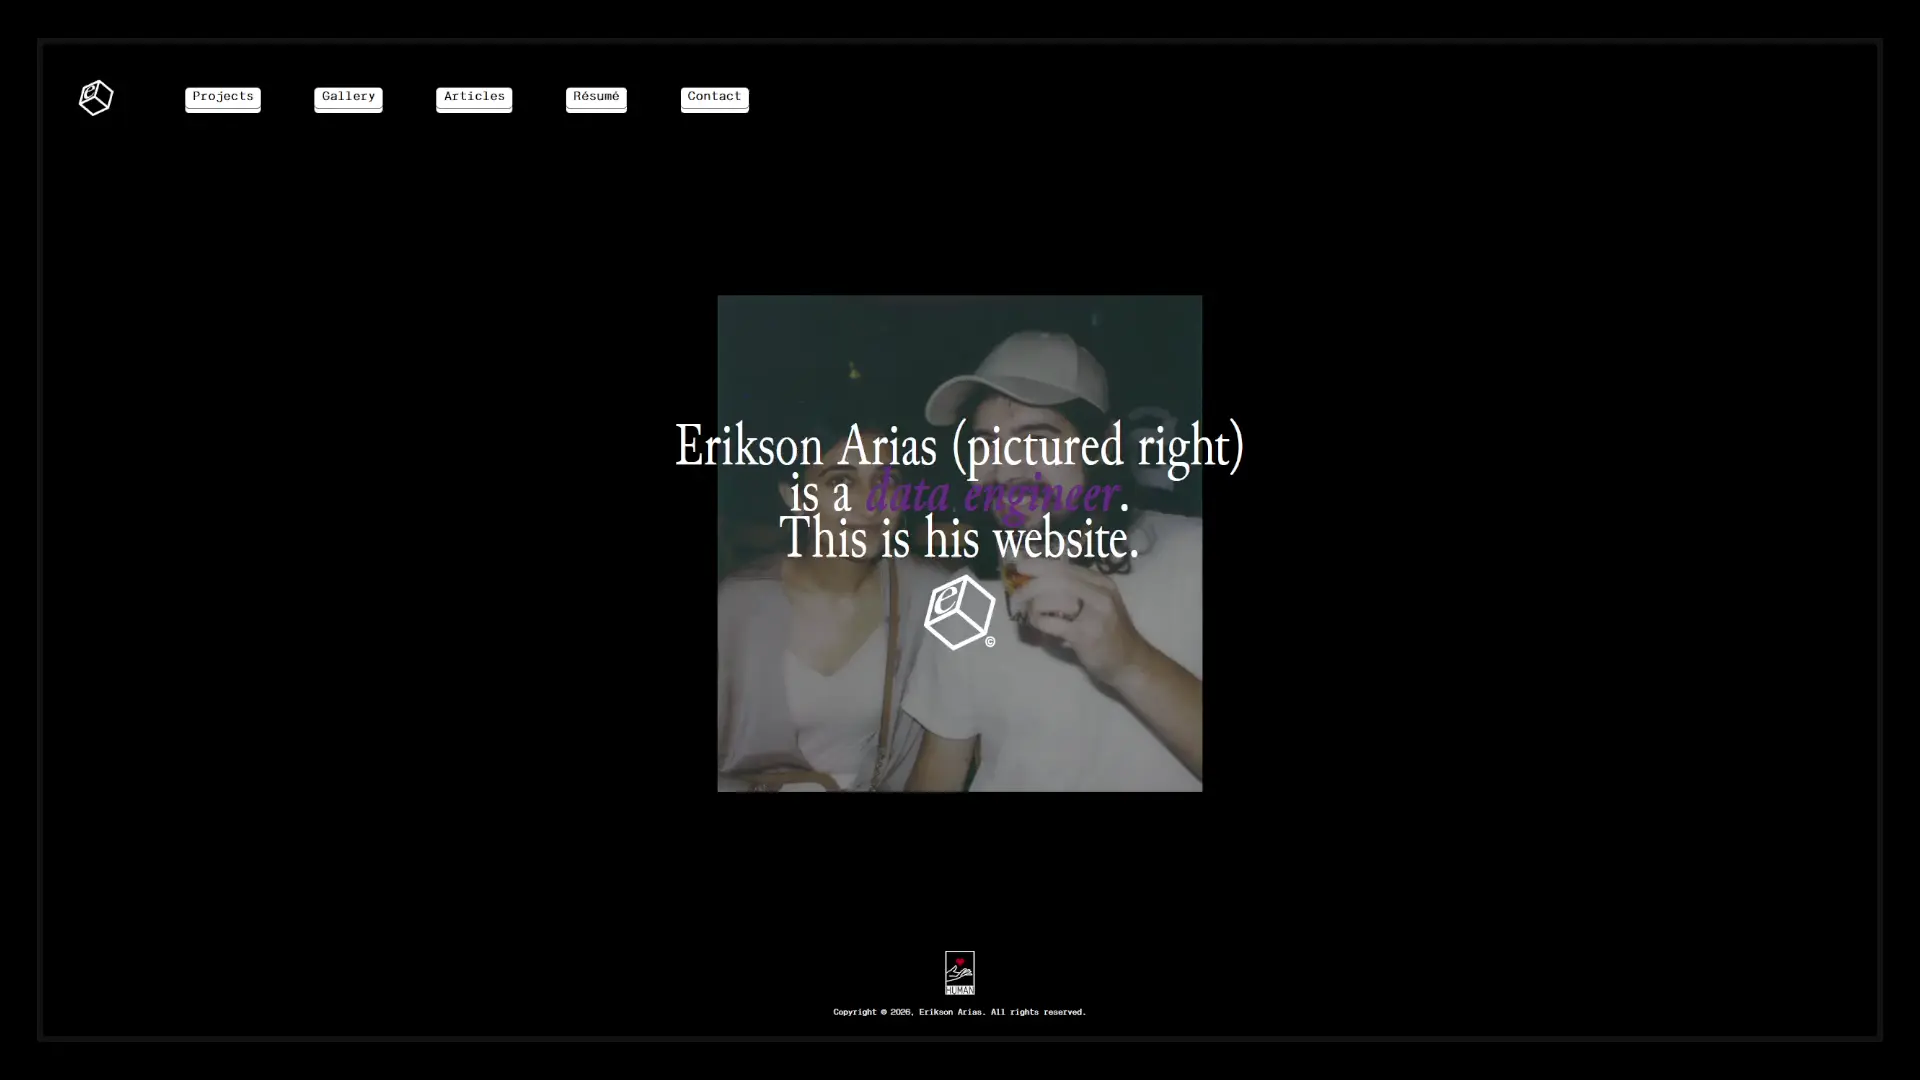
We'll need to set up a place for our blocks to appear on the homepage: a stage. We'll create a div element spanning the width and height of the viewport, absolutely positioned. For sake of simplicity, we'll hide the stage on mobile.
<body>
    {{ nav | safe }}
    <content id="homepage">
        <div id="hero">
            <div id="hero-img">
                <img id="hero-img-img" src="{{ from_cdn }}/img/site-resources/{{ hero }}">
            </div>
            <p>Erikson Arias (pictured right)</p>
            <p>is a <span id="is-a">data engineer</span>.</p>
            <p>This is his website.</p>
            <div id="hero-logo">
                <img src="{{ from_cdn }}/img/logo_white_c.png">
            </div>
        </div>
        <!-- we create the stage here -->
        <div id="stage" class="desktop-only">
        </div>
        <!-- -->
    </content>
    <footer id="home-footer">
        <a href="/human" id="human">
            <img src="{{ from_cdn }}/img/human/human_bg_tiny.png">
        </a>
        Copyright © {{ year }}, Erikson Arias. All rights reserved.
    </footer>
</body>
Then we can create our stage styling to make sure it's positioned and z-indexed properly, and we can throw in some rules for our future .block elements. We won't define a size for the blocks just yet; we can do that programmatically in JavaScript for tuning.
#stage {
    display: flex;
    position: absolute;
    align-items: center;
    justify-content: center;
    width: 100vw;
    height: 100vh;
    top: 0;
    left: 0;
    z-index: 10;

    .block {
        aspect-ratio: 1/1;
        position: absolute;
        background-color: white;
        box-sizing: border-box; /* this will come in handy later */
    }
}
Now we can add a small listener function that creates a new .block with a key press, making sure to call our script in our HTML.
const BLOCK_SIZE = 75;
const STAGE = document.getElementById("stage");

function createBlock() {
    var el = document.createElement("div");
    el.classList.add("block");
    el.style.width = `${BLOCK_SIZE}px`;
    el.style.height = `${BLOCK_SIZE}px`;

    STAGE.appendChild(el);
}

document.addEventListener("keydown", function (event) {
    createBlock();
});
<script src="/static/js/blocks.js"></script>

While we're here, let's get the hero image and text out of the way when the block appears. It'll be like a "mode", where activating the block puts the page in "block mode". A boolean flag will do nicely.
Of course, the more we activate the listener, the more blocks we add to the DOM, and so it'd be in our best interest to set a cap on the number of blocks we can make.
(We'll also quietly z-index our stage to sit behind our navigation and footer z-layers. Code not shown, but should be simple enough.)
const BLOCK_SIZE = 75;
const STAGE = document.getElementById("stage");

function createBlock() {
    var el = document.createElement("div");
    el.classList.add("block");
    el.style.width = `${BLOCK_SIZE}px`;
    el.style.height = `${BLOCK_SIZE}px`;

    STAGE.appendChild(el);
}

var isActive = false;
var blockCount = 0;
document.addEventListener("keydown", function (event) {
    // Activate block mode
    if(!isActive) {
        document.getElementById("hero").style.opacity = 0;
        document.getElementById("hero").style.userSelect = "none";
        isActive = true;
    }

    // Max block count at 9
    if(blockCount < 9) {
        createBlock();
        blockCount++;
    }
});
So now we're creating a stack of at most 9 blocks in the center of the stage element; they stack due to their absolute positioning. We'll need to spread them out on a grid, and we can do that by defining the positions the blocks can occupy. We've already defined our blocks with BLOCK_SIZE, our grid positions should scale accordingly.
We'll enumerate our available grid positions and a flag indicating if the position is occupied. Then for this exercise, we'll simply iterate each position one after another; we don't need to set the occupancy flags yet since definitionally we can't occupy the same position twice. Then we'll use CSS transform to offset each block into their position.
...

const ALL_POSITIONS = [
    { idx: 0, "x": BLOCK_SIZE*-1, "y": BLOCK_SIZE*-1, "isOccupied": false },
    { idx: 1, "x": 0, "y": BLOCK_SIZE*-1, "isOccupied": false },
    { idx: 2, "x": BLOCK_SIZE, "y": BLOCK_SIZE*-1, "isOccupied": false },
    { idx: 3, "x": BLOCK_SIZE*-1, "y": 0, "isOccupied": false },
    { idx: 4, "x": 0, "y": 0, "isOccupied": false },
    { idx: 5, "x": BLOCK_SIZE, "y": 0, "isOccupied": false },
    { idx: 6, "x": BLOCK_SIZE*-1, "y": BLOCK_SIZE, "isOccupied": false },
    { idx: 7, "x": 0, "y": BLOCK_SIZE, "isOccupied": false },
    { idx: 8, "x": BLOCK_SIZE, "y": BLOCK_SIZE, "isOccupied": false }
]

...

function createBlock(position) {
    var el = document.createElement("div");
    el.classList.add("block");
    el.style.width = `${BLOCK_SIZE}px`;
    el.style.height = `${BLOCK_SIZE}px`;
    el.style.transform = `translate(${position.x}px, ${position.y}px)`;

    STAGE.appendChild(el);
}

var isActive = false;
var blockCount = 0;
document.addEventListener("keydown", function (event) {
    if (!isActive) {
        document.getElementById("hero").style.opacity = 0;
        document.getElementById("hero").style.userSelect = "none";
        isActive = true;
    }

    // Max block count at 9
    if (blockCount < 9) {
        createBlock(ALL_POSITIONS[blockCount]);
        blockCount++;
    }
});
Now we have blocks and a small grid to work with, but we can be a bit more dynamic with this setup by not filling all available positions and randomizing the fill pattern. Starting with the randomness, we can whip up a couple of quick helper functions in a separate script file to keep things tidy (and quietly add the script to the homepage HTML, above our blocks.js import to ensure these functions are available to it).
// Return a random integer up to max.
function randInt(max) {
  return Math.floor(Math.random() * max);
}

/*
  Choose a random element from a list.

  If given a last selected value, will select an element from the list
  that does not match the last value.
*/
function choose(list, last=null) {
  if(last == null) {
    return list[randInt(list.length)];
  }

  var choice = null;
  while (choice == null || choice == last) {
    choice = list[randInt(list.length)];
  }

  return choice;
}
Then using these, we can also leverage our occupancy flags to make sure we aren't trying to fill an occupied space when we select a position at random.
const MAX_BLOCKS = 7;
...

function createBlock(position) {
    var el = document.createElement("div");
    el.classList.add("block");
    el.style.width = `${BLOCK_SIZE}px`;
    el.style.height = `${BLOCK_SIZE}px`;
    el.style.transform = `translate(${position.x}px, ${position.y}px)`;
    position.isOccupied = true; // set occupancy flag

    STAGE.appendChild(el);
}

var isActive = false;
var blockCount = 0;
var lastPos = null; // track last populated position
document.addEventListener("keydown", function (event) {
    if (!isActive) {
        document.getElementById("hero").style.opacity = 0;
        document.getElementById("hero").style.userSelect = "none";
        isActive = true;
    }

    if (blockCount < MAX_BLOCKS) {
        var newPos = choose(ALL_POSITIONS, lastPos);

        // If random position is occupied, try another random pick.
        while(newPos.isOccupied) {
            newPos = choose(ALL_POSITIONS, lastPos);
        }

        createBlock(newPos);
        blockCount++;
        lastPos = newPos;
    }
});
Lastly, we can add some colors and transitions to the blocks as they're created. They'll start solidly colored and then fade into same-colored outlines (hence our box-sizing: border-box in our CSS), with their color randomly selected. I have my site's colors defined as CSS variables in my main styles.css, so we can reference them using var(--green) and the like.
const COLORS = ["var(--green)", "var(--yellow)", "var(--blue)", "var(--red)", "var(--purple)"];
...

function createBlock(position) {
    var el = document.createElement("div");
    el.classList.add("block");
    el.style.width = `${BLOCK_SIZE}px`;
    el.style.height = `${BLOCK_SIZE}px`;
    el.style.transform = `translate(${position.x}px, ${position.y}px)`;
    position.isOccupied = true; // set occupancy flag

    // Set colors
    var color = choose(COLORS);
    el.style.backgroundColor = color;
    el.style.border = `3px solid ${color}`;
    el.style.transition = "transition: all 0.25s ease"; // for a smooth animation

    STAGE.appendChild(el);

    // Change from solid to outline after about a quarter second delay.
    setInterval(function() {
        el.style.backgroundColor = null;
    }, 200);
}

...
Adding letters
Throwing letters into the blocks is as simple as setting innerText on each element, for fun we can set it equal to the last key pressed. The keydown event gives us access to key, and a simple regex test can suppress the block behavior for all keys outside of alphabetic characters. Then we can pass in a new letter argument to createBlock() to set each block's innerText.
We'll also adjust our .block CSS to use flexbox to center the innerText, and we'll add a bottom padding to compensate for font line height variances. Here I'm using Junicode, and a 25px bottom padding seems to do the trick. For simplicity, we'll force the innerText to be uppercase to avoid below-baseline character centering shenanigans. I've also done other text nudging to get the feeling just right, but other fonts will have other needs.
Finally, we'll start the text's color off on white and then ease into the block's overall color to reinforce the animation.
...

function createBlock(position, letter) {
    var el = document.createElement("div");
    el.classList.add("block");
    el.style.width = `${BLOCK_SIZE}px`;
    el.style.height = `${BLOCK_SIZE}px`;
    el.style.transform = `translate(${position.x}px, ${position.y}px)`;
    var color = choose(COLORS);
    el.style.backgroundColor = color;
    el.style.border = `3px solid ${color}`;
    el.style.transition = "transition: all 0.25s ease";

    el.innerText = letter; // add letter

    position.isOccupied = true;
    STAGE.appendChild(el);

    // Change from solid to outline after about a quarter second delay.
    setInterval(function() {
        el.style.backgroundColor = null;
    }, 200);
}

...

document.addEventListener("keydown", function (event) {
    // Filter for letters only
    if(/^[a-z]/.test(event.key)) {
        if(!isActive) {
            document.getElementById("hero").style.opacity = 0;
            document.getElementById("hero").style.userSelect = "none";
            isActive = true;
        }

        if(blockCount < MAX_BLOCKS) {
            var newPos = choose(ALL_POSITIONS, lastPos);

            // If random position is occupied, try another random pick.
            while(newPos.isOccupied) {
                newPos = choose(ALL_POSITIONS, lastPos);
            }

            createBlock(newPos, event.key);
            blockCount++;
            lastPos = newPos;
        }
    }
});
#stage {
    display: flex;
    position: absolute;
    align-items: center;
    justify-content: center;
    width: 100vw;
    height: 100vh;
    top: 0;
    left: 0;
    z-index: 10;

    .block {
        font-family: "Junicode", serif;
        font-style: italic;
        font-weight: bold;
        line-height: 0.2;
        padding-bottom: 25px;
        aspect-ratio: 1/1;
        position: absolute;
        background-color: white;
        box-sizing: border-box;
    }
}
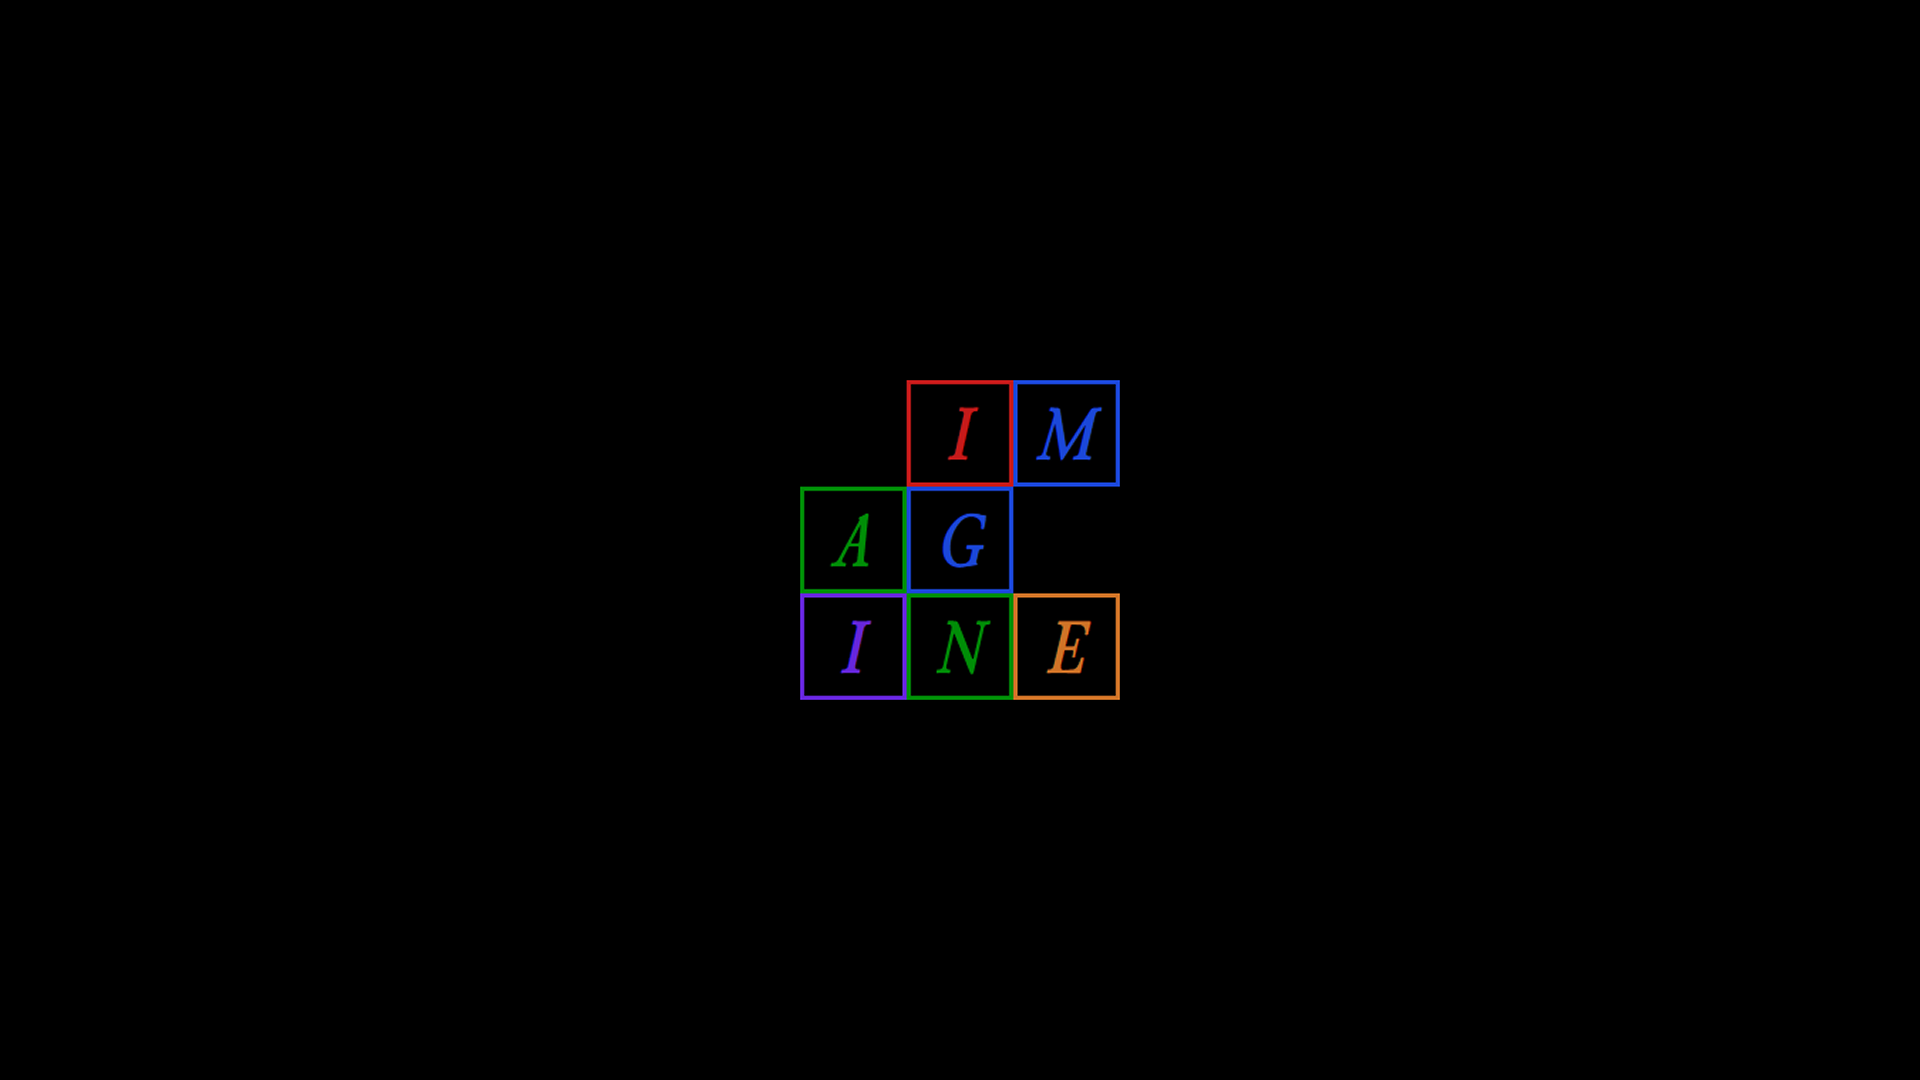
But it's here that we run into a small issue: if we want to choose what word is spelled out by the blocks, we need to ensure the letters are in order even though the blocks are created at random. I like the direction this has gone so far, but implementing the ideal readability rules from the design study might be out of scope. For now, we can settle for getting the letters in the correct order.
The procedure we'll implement will go something like this:
- Precompute the positions that will be occupied.
- Assign letters in our word to each of the precomputed positions.
- Each keystroke reveals each position in a random order.
Our precompute() function would handle the first two tasks:
...

function precompute(_positions, word) {
    // Make a copy of the positions list and randomize its order.
    // structuredClone is needed for copies of lists of objects.
    var randPositions = structuredClone(_positions);
    randPositions.sort(() => Math.random() - 0.5);

    // Adjust number of output positions relative to the input word,
    // bounded if there are more letters than positions, further bounded
    // if both exceed our MAX_BLOCKS setting.
    var n = Math.min(_positions.length, word.length, MAX_BLOCKS)

    // Take the top N elements in our randomized positions list.
    randPositions = randPositions.slice(0, n);

    // Re-sort our randomized positions in index order.
    randPositions.sort(function (a, b) {
        var idxA = a.idx;
        var idxB = b.idx;

        if (idxA < idxB) return -1;
        if (idxA > idxB) return 1;
        return 0;
    });

    // Assign each letter in our word to each position.
    for (var i = 0; i < randPositions.length; i++) {
        randPositions[i].letter = word.charAt(i);
    }

    return randPositions
}

...
To punctuate the use of structuredCopy(), there are other methods of shallow copying arrays in JavaScript such as slice() and [...array] that are perfect for lists of primitives but will not work for lists of objects. These other methods will instead copy references to those objects; any attribute-setting will be applied globally.
Now we have a list of positions with letters guaranteed to be in word order, so all that remains is to layer this new function into our existing logic.
...

function createBlock(position) { // we drop the letter parameter...
    console.log(position);
    var el = document.createElement("div");
    el.classList.add("block");
    el.style.width = `${BLOCK_SIZE}px`;
    el.style.height = `${BLOCK_SIZE}px`;
    el.style.transform = `translate(${position.x}px, ${position.y}px)`;
    var color = choose(COLORS);
    el.style.backgroundColor = color;
    el.style.border = `3px solid ${color}`;
    el.style.transition = "transition: all 0.25s ease";

    el.innerText = position.letter.toUpperCase(); // ...because we get the letter from our position object
    el.style.fontSize = "55px";
    el.style.color = "white";

    position.isOccupied = true;
    STAGE.appendChild(el);

    setInterval(function () {
        el.style.backgroundColor = null;
        el.style.color = color;
    }, 200);
}

...

var positions = precompute(ALL_POSITIONS, "BLOCKED"); // precompute positions
document.addEventListener("keydown", function (event) {
    if(/^[a-z]/.test(event.key)){
        if (!isActive) {
            document.getElementById("hero").style.opacity = 0;
            document.getElementById("hero").style.userSelect = "none";
            isActive = true;
        }

        if (blockCount < MAX_BLOCKS) {
            var newPos = choose(positions);

            while(newPos.isOccupied) {
                newPos = choose(positions);
            }

            createBlock(newPos); // we no longer pass in a letter here
            blockCount++;
            lastPos = newPos;
        }
    }
});

Resetting
If we can now reliably spell out one word, why not multiple words in rotation? To do that, we'd need to be able to reset the blocks on the step after our MAX_BLOCKS limit is reached. All we need to do is check if the limit was reached, reset the block counter, and remove all blocks from the DOM for the next cycle.
...

const WORDS = ["BLOCKED", "???????", "!!!!!!!"];

...

var lastWord = choose(WORDS); // store our last word to avoid showing the same word twice consecutively
var positions = precompute(ALL_POSITIONS, lastWord);
document.addEventListener("keydown", function (event) {
    if(/^[a-z]/.test(event.key)){
        if (!isActive) {
            document.getElementById("hero").style.opacity = 0;
            document.getElementById("hero").style.userSelect = "none";
            isActive = true;
        }

        if (blockCount < MAX_BLOCKS) {
            var newPos = choose(positions);

            while(newPos.isOccupied) {
                newPos = choose(positions);
            }

            createBlock(newPos);
            blockCount++;
            lastPos = newPos;
        } else {
            // Remove all current blocks from the DOM.
            Array.from(document.getElementsByClassName("block")).forEach((el) => {
                el.remove();
            });
            blockCount = 0; // reset block count
            lastWord = choose(WORDS, lastWord); // remember last word
            positions = precompute(ALL_POSITIONS, lastWord); // precompute next configuration
        }
    }
});
(Ignore that "BLOCKED" appears twice consecutively in this animation, I forgot to set lastWord for that demo and I'm disinclined to take a mulligan.)
We can make the end of each cycle a little less abrupt with a bit of animation. We'll put that functionality in a new function:
...

function removeBlock(block, t=250) {
    block.style.transition = "none";
    block.style.color = "white";
    block.style.backgroundColor = "white";
    block.style.border = "3px solid white";
    block.style.boxShadow = "0px 0px 29px 2px white";

    block.animate(
        [
            { opacity: 1 },
            { opacity: 0 }
        ],
        { duration: t, easing: "ease-out", fill: "forwards"}
    );

    // Remove block from the DOM a little after the animation completes.
    setInterval(() => {
        block.remove();
    }, t+100);
}

...

document.addEventListener("keydown", function (event) {
    if(/^[a-z]/.test(event.key)){
        if (!isActive) {
            document.getElementById("hero").style.opacity = 0;
            document.getElementById("hero").style.userSelect = "none";
            isActive = true;
        }

        if (blockCount < MAX_BLOCKS) {
            var newPos = choose(positions);

            while(newPos.isOccupied) {
                newPos = choose(positions);
            }

            createBlock(newPos);
            blockCount++;
            lastPos = newPos;
        } else {
            Array.from(document.getElementsByClassName("block")).forEach((el) => {
                removeBlock(el); // call new remove function
            });
            blockCount = 0;
            lastWord = choose(WORDS, lastWord);
            positions = precompute(ALL_POSITIONS, lastWord);
        }
    }
});
They don't act simultaneously on removal due to for-loop timing differences, but I think I'll treat it as a happy accident that adds a small bit of visual interest.
For some extra flair, we can add a background animation that appears on cycle completion then eases out over a couple of seconds. We'll absolutely position the background element with some mild stretching. It will start transparent and flash opaque on cycle complete. It'll also be z-indexed negatively to keep it properly in the background.
Our particular background is an animation I've created before now converted to a GIF. Why GIF? Two reasons: browser performance and dithering. While we do have WEBP for animations, I've found that their framerate occasionally slows to a crawl; no doubt it's happened in this very writing. How browsers process WEBP data is still relatively new, but GIF processing has been around for decades and is much more stable. Plus for the digital etherealism that I enjoy, the dithering from GIF compression adds a lovely bit of texture.
...

const BLOCKS_BG = document.createElement("div");
BLOCKS_BG.id = "blocks-bg";
STAGE.appendChild(BLOCKS_BG);

...

function playBackground() {
    BLOCKS_BG.style.opacity = 1;
    BLOCKS_BG.animate(
        [
            { opacity: 1 },
            { opacity: 0 }
        ],
        { duration: 2000, easing: "ease-out", fill: "forwards" }
    )
}

...

document.addEventListener("keydown", function (event) {
    if(/^[a-z]/.test(event.key)){
        if (!isActive) {
            document.getElementById("hero").style.opacity = 0;
            document.getElementById("hero").style.userSelect = "none";
            isActive = true;
        }

        if (blockCount < MAX_BLOCKS) {
            var newPos = choose(positions);

            while(newPos.isOccupied) {
                newPos = choose(positions);
            }

            createBlock(newPos);
            blockCount++;
            lastPos = newPos;
        } else {
            Array.from(document.getElementsByClassName("block")).forEach((el) => {
                removeBlock(el);
            });
            playBackground(); // on cycle complete
            blockCount = 0;
            lastWord = choose(WORDS, lastWord);
            positions = precompute(ALL_POSITIONS, lastWord);
        }
    }
});
#stage {
    ...

    #blocks-bg {
        position: absolute;
        height: 100vh;
        width: 100vw;
        opacity: 0;
        background-image: url("https://cdn.eriksonarias.dev/eriksonarias_dev/img/sky.gif");
        background-size: 200%;
        background-repeat: no-repeat;
        background-position: center;
        z-index: -1;
    }

    ...
}

Sound
I think at this point the visuals and interactivity are in a great spot, but just a bit of audio would push this even further. We'll use:
- A short, tactile sound for each block.
- A huge, ethereal wash for each cycle complete. Maybe several in rotation to keep the sound fresher for longer.
I already have two sounds in mind. For the first, there's a percussion sound used in Totaka's Song from Luigi's Mansion that starts with a crisp bite and a gooey, elastic release. It's one of my favorite sounds period. The second, a few slices from one of my favorite soundscapes patchtalk, pitched down three semitones with some extra reverb on the tail to make it feel weighty and vast.
To start, we'll create some Audio constants and a couple of helper methods:
...

const MUSIC1 = new Audio("https://cdn.eriksonarias.dev/eriksonarias_dev/sound/patchtalk-1.mp3");
const MUSIC2 = new Audio("https://cdn.eriksonarias.dev/eriksonarias_dev/sound/patchtalk-2.mp3");
const MUSIC3 = new Audio("https://cdn.eriksonarias.dev/eriksonarias_dev/sound/patchtalk-3.mp3");
const MUSIC4 = new Audio("https://cdn.eriksonarias.dev/eriksonarias_dev/sound/patchtalk-4.mp3");
const MUSIC = [MUSIC1, MUSIC2, MUSIC3, MUSIC4]; // we'll rotate through these

...

// We use this function for the block create sound.
function play(url) {
    new Audio(url).play();
}


// We use this function for the cycle complete sound.
var musicIdx = 0;
function playBackgroundSound() {
    var audio = MUSIC[musicIdx];
    MUSIC.forEach((m) => {
        if (!m.paused) {
            m.volume = m.volume / 2;
        }
    });
    audio.volume = 1;
    audio.pause();
    audio.currentTime = 0;
    audio.play();
    musicIdx = (musicIdx + 1) % MUSIC.length;
}

...
So we need two separate audio helper functions for a couple of reasons:
- For the block creation sound, having a single, reusable
Audioobject and calling itsplay()function will force the audio playhead to reset, leading to stuttering and prematurely-cut audio. Every time a block is created, we need it to instantiate its ownAudioobject, allowing the sound to overlap and play to completion. - For the cycle complete sound, we want to rotate through several different sounds. At most, four sounds can be playing simultaneously, which can be tiring on account of them being so harmonically rich and relatively long-playing. To prevent a buildup of audio, every time we play a new background sound, we cut the volume of all other currently playing background sounds by 50%. In the event that a sound is still playing after a full rotation, we reset its playhead before playing.
We can then layer these new functions into our existing functions:
...

function createBlock(position) {
    console.log(position);
    var el = document.createElement("div");
    el.classList.add("block");
    el.style.width = `${BLOCK_SIZE}px`;
    el.style.height = `${BLOCK_SIZE}px`;
    el.style.transform = `translate(${position.x}px, ${position.y}px)`;
    var color = choose(COLORS);
    el.style.backgroundColor = color;
    el.style.border = `3px solid ${color}`;
    el.style.transition = "transition: all 0.25s ease";

    el.innerText = position.letter.toUpperCase();
    el.style.fontSize = "55px";
    el.style.color = "white";

    position.isOccupied = true;

    play("https://cdn.eriksonarias.dev/eriksonarias_dev/sound/kiss.wav"); // on block create
    STAGE.appendChild(el);

    setInterval(function () {
        el.style.backgroundColor = null;
        el.style.color = color;
    }, 200);
}

...

function playBackground() {
    playBackgroundSound(); // we attach the sound to the cycle complete function
    play("https://cdn.eriksonarias.dev/eriksonarias_dev/sound/kiss.wav"); // we'll also play the block create sound for continuity
    BLOCKS_BG.style.opacity = 1;
    BLOCKS_BG.animate(
        [
            { opacity: 1 },
            { opacity: 0 }
        ],
        { duration: 2000, easing: "ease-out", fill: "forwards" }
    )
}

...
Gorgeous.
Some shake
We can add just a tiny bit of movement by shaking the blocks container with each new block. We can leverage CSS transform again, though if we want to keep the grid positioning transforms intact, we'll need to wrap the blocks in a parent container and apply the new movement on the parent.
...

const BLOCKS_CONTAINER = document.createElement("div");
BLOCKS_CONTAINER.id = "blocks";
STAGE.appendChild(BLOCKS_CONTAINER);

...

function createBlock(position) {
    var el = document.createElement("div");
    el.classList.add("block");
    el.style.width = `${BLOCK_SIZE}px`;
    el.style.height = `${BLOCK_SIZE}px`;
    el.style.transform = `translate(${position.x}px, ${position.y}px)`;
    var color = choose(COLORS);
    el.style.backgroundColor = color;
    el.style.border = `3px solid ${color}`;
    el.style.transition = "background-color 0.25s ease, color 0.25s ease";
    el.innerText = position.letter.toUpperCase();
    el.style.fontSize = "55px";
    el.style.color = "white";

    position.isOccupied = true;
    play("https://cdn.eriksonarias.dev/eriksonarias_dev/sound/kiss.wav");
    BLOCKS_CONTAINER.style.transform = `translate(${randInt(16)-8}px, ${randInt(16)-8}px)`; // shake by 8px in any direction
    BLOCKS_CONTAINER.appendChild(el);

    setInterval(function () {
        el.style.backgroundColor = null;
        el.style.color = color;
    }, 200);
}

...
#stage {
    ...

    #blocks {
        display: flex;
        justify-content: center;
        align-items: center;
        transition: 0.05s all ease;
    }

    ...
}
Timing
Now for the final addition, a bit of a nuanced feature, we'll make block creation evenly timed when a key is held to create a simple straight rhythm.
If we were to hold a key down now, the first block would appear, followed by a long pause, then followed by a rapid stream of blocks. How the keyboard behaves on key hold is at the discretion of the operating system; we can't rely on the operating system to keep time for us when a key is held. At the same time, we can't reliably intercept the rapid-fire key events such that we can keep consistent timing.
So we revisit the concept of modes again. While we can't consistently manage each key event on hold, we can intercept the keydown and keyup events, using each to swap into play and pause modes.
To do this somewhat gracefully, we'll need to shift some code around, namely by creating a function that handles all the secondary function calls to create blocks and perform cycle resets. Then we'll call this function regularly using setInterval() when we know a key is being held; when the key is released, the interval is cleared and the cycle stops.
...

var isKeyDown = false; // key held flag
var interval = null; // interval for block creation and reset timings, needs to be passed to keyup event listener for clearing

...

// Cycle reset function
function nextBlock() {
    if(blockCount < MAX_BLOCKS) {
        interval
        var newPos = choose(positions);

        while (newPos.isOccupied) {
            newPos = choose(positions);
        }

        createBlock(newPos);
        blockCount++;
        lastPos = newPos;
    } else {
        playBackground();
        Array.from(document.getElementsByClassName("block")).forEach((el) => {
            removeBlock(el);
        });
        blockCount = 0;
        lastWord = choose(WORDS, lastWord)
        positions = precompute(ALL_POSITIONS, lastWord);
    }
}


document.addEventListener("keydown", function(event) {
    if(/^[a-z]/.test(event.key)){
        if (!isActive) {
            document.getElementById("hero").style.opacity = 0;
            document.getElementById("hero").style.userSelect = "none";
            isActive = true;
        }

        // check if key is held
        if(!isKeyDown) {
            isKeyDown = true; // signal that key is held
            nextBlock(); // immediately step through cycle on key held
            interval = setInterval(() => { // step through cycle every 100ms
                nextBlock();
            }, 100);
        }
    }
});

// On key release, signal that key is no longer held and clear block creation interval
document.addEventListener("keyup", () => {
    isKeyDown = false;
    clearInterval(interval);
});
The result
Conclusion
In the end, this small project took two days to realize from start to finish. There were a lot of quirks to learn, challenges to navigate, and expectations to reconsider as this piece learned to walk. But once I found out what was possible, it quickly learned to run. It was all a process of discovering what this thing was going to be in the end.
I was inspired to create, and though bounded by constraints it was freed from expectations. There was no reality in which this experiment could disappoint; it could only surprise.
Maybe I'll keep iterating on this idea, adding guardrails and fine carpentry, but I think it's more than sufficient to let out into the wider world, and hopefully others will be as delighted in experiencing it was I was in making it.
Finished code
The finished code is available through Forgejo:
- blocks.js
- utils.js
- styles.css, look for
#stage - home.html, look for the element with ID
stageand the script imports after thebodytag